Boxcar Press Printers’ Tips for 2020

A new year and a fresh new decade signals one thing: a new wave of brilliant letterpress!  We polled our printers here at Boxcar Press to give us their quick, top printing tips to help jumpstart 2020. Perhaps a few of these nuggets of wisdom will make their way into your next printing adventure!

Want to share your top tip? Let us know in the comments section below!
Printers Tips Printing Tips - Boxcar Press
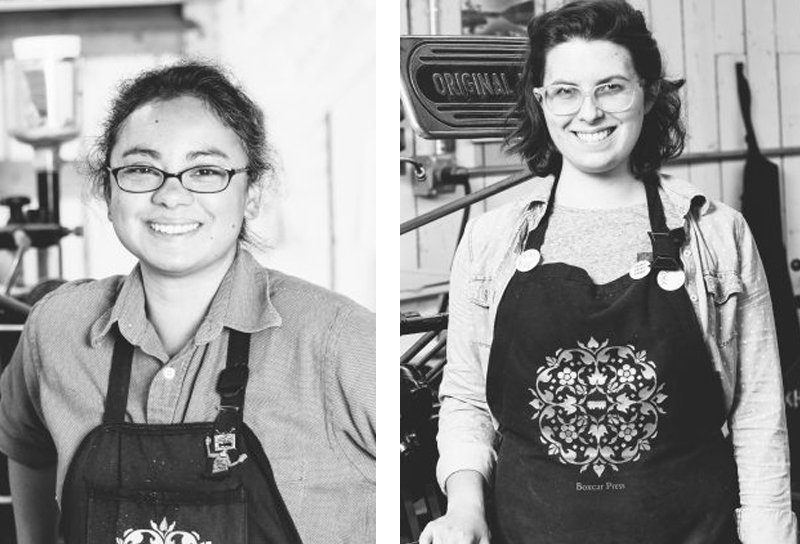
(from left to right: Carrie, Maddie)

CARRIE – Heidelberg Windmill Operator

If you have a thin rule line or the end of a line of type that is getting too blobby, try using an “end cap” of a scrap photopolymer plate (like a small rectangle of it) and put it beyond the trim area. This is so that the rollers use it like an inking roller bearer strip. It helps keep the pressure off that one trouble spot.

MADDIE – Heidelberg Windmill Operator

When beginning a job, do a dry paper test run. There shouldn’t be any impression or ink. This run is so you can adjust the tilt sucker bar to where you want it, make sure it isn’t double-feeding, adjust the tempo of the paper pick-up and more.  Getting this out of the way is one less thing you don’t have to fuss with while in the middle of a job.

(from left to right: Jeff, Leanna, Lou)

JEFF – Kluge Operator (Foil)

For foil on a Kluge, make sure you are using the correct suckers and are maintaining them. Metal suckers work for text weight and envelope liners. Rubber suckers are good for text weight, coaster stock, thinner leather, or textiles.  To keep them in shape, I’ll use a bent paper clip or something small to clean out any fibers or lint that may get up there.

LEANNA – Heidelberg Windmill Operator

If you are doing something double-sided and are trying to avoid show-through on the other side, use glassine board in the packing.

LOU – Heidelberg Windmill Operator

Printing envelopes on the Windmill with a lay pin is a bit labor-intensive but it can work. You’ll need to cut out a shape in the tympan where the lay pin will “nestle” into. This is so that the pin has a place to rest into and not mark the envelope when the press closes.  Or alternatively, use our Boxcar Press swing away lay gauge so you don’t have to worry about marks.

Printers Tips Printing Tips - Boxcar Press
(from left to right: Jake, Phil, Paul)

JAKE – Heidelberg Windmill Operator

When working to print lighter pastel ink colors on the Heidelberg Windmill try the following:

First, use an aggressive cleaner (Putz Pomade comes to mind) to help clean out any remaining ink from a previous run.

Make sure the ink is mixed up correctly and proportionately. Having a ready-to-go pre-mixed stock of ink is very handy (like Cool Grey 1 or other ink colors that contain a lot of Transparent White).

Use a very small bit of ink (small dabs or dots) and slowly add it to the roller. This first ink test run will mostly be checking consistency and to see if there is any ink leftover from a previous run. Run make-ready scrap through the press to see where you stand.

PHIL – Kluge Operator (Foil)

If you are running large solids for foil on a Kluge and are only getting the center to print, adjust the base itself using the screws. Most of the time, the base isn’t hitting flush and making these adjustments will help. Use glass board with soft packing on top. Try using a glue stick to glue the soft packing together as well. The compressed paper and glue makes for an even surface.

PAUL – Heidelberg Windmill Operator (Foil)

When doing foil on the Windmill, getting the right temperature for release can be tricky. Start by keeping good notes at regular intervals on foil release temperatures & times to keep things organized. A journal, jotter, or dedicated scrap of paper will do. When on the press for a job, regularly write down the temperatures so you can go back to it if you need to re-run the job. This helps a lot.

Printers Tips Printing Tips - Boxcar Press
(from left to right: Stan, Pat, Bill)

STAN – Heidelberg Windmill Operator (Foil)

Wear comfortable shoes and don’t be distracted by smartphones as you’ll need to be listening to the sounds your press is making. For example, there is a subtle difference in the whooshing sound when the suckers are picking up the paper correctly…. and when it’s not.

PAT – Heidelberg Windmill Operator

If you are printing black letterpress on a Heidelberg and want a richer, deeper coverage, try a double-hit of the black ink runs (two regular ink run passes — one on top of the other). This helps reduce over-inking. Take care that you are in perfect registration.

BILL – Heidelberg Windmill Operator

Use transparent tape on the Windmill rails to help even out high and low spots. A piece here or there can make all the difference in the laying down of ink along the rails.


2018 Holiday Letterpress Gift Guide

We count down the top 18 gift ideas in our 2018 Holiday Letterpress Gift Guide for that special printer on your list. Featuring calendars, prints, and type-themed goodies that are sure to please!  Let us know what’s on your wishlist in the comments section below!

Holiday Gift Guide 2018

1.  Flurry Paper from Boxcar Press.  | 2. The Vandercook 100 book by JustVandy   | 3.  PANTONE holiday ornament by PANTONE.   | 4. RGB & CMYK & PANTONE sticker by gschroeds.  | 5. Letterpress Metal Type 110 piece puzzle by alicing.  | 6. Hamilton Wood Type Water Bottle from Hamilton Wood Type.

Holiday Gift Guide 2018

7.  Letterpress type Serving Tray by forrest.   8. Live Love Letterpress mug by OddMatter .  | 9. Letterpress Metal Type Composing Stick Enamel Pin  by ThePaperCarnival.  | 10.  2019 Fundraising Calendar from Green Pea Press. 11. 2019 Letterpress Calendar by HighwayPress.  | 12. Heidelberg Windmill Press t-shirt by Boxcar Press.

Holiday Gift Guide 2018

13. Hamilton Wood Type Blue Pullover Hoodie from Hamilton Wood Type. | 14. Daredevil furniture from Springtide Press.  |  15. Gallery Magnets from Springtide Press.  |  16. Printing Digital Type on the hand-operated flatbed cylinder by Gerard Lang |   17. Letterpress Paper Turtle Sculpture Kit by Questionable Press.

20th Anniversary Boxcar Press printing apron - Boxcar Press - Holiday Gift Guide 2018

18.  Boxcar Press Printing Apron by Boxcar Press.

Benjamin Eakin: New Beginnings with Quite Simply Cards

Letterpress finds us all and captivates us in one way or another. Benjamin Eakin of E. W. Card Crafts is no exception. From a rich printing history with his father in the newspaper business in Quanah, Texas, to navigating the transition from the old-school style of hands-on typesetting to the digital and modern age of letterpress printing, Benjamin has taken up the gauntlet of the challenges of starting a new part-time letterpress business. Armed with a small but mighty Craftsman Superior (that rode shotgun in his car on the return journey home after acquiring it), he is testing out the waters and is finding himself discovering new projects, a new greeting card line and championing the zealous ambition all letterpress printers share: the dream of getting back on press for just a little bit longer.

Benjamin Eakin of E.W. Card Crafts (Texas, USA), letterpress prints hand-made text-focus cards with brilliance and panache.

A RETURN TO LETTERPRESS To my utter dismay, I find I will soon turn 64. No idea at all how that happened but, well, here I am. I’ve worked at many things over the years, including a 16-year stint with my father and our book publishing company, software support for a book publishing software company, some time with a CPA, and my current position is the cash office of an international kidney dialysis company, among other things. Eakin Press originally published mainly Texas history and began as an extension of Nortex Press which had been printing county histories for a number of years. In turn, Nortex Press started as an extension of the Quanah Tribune Chief newspaper for the express purpose of printing county histories.

PRINTING TRADITIONS I grew up in the newspaper business in the 50s and 60s in north Texas. My father was the editor of the Quanah Tribune Chief in Quanah, Texas. At the time, the population was about 5,000. When we moved there when I was five, the newspaper had letterpress presses only. Even after a new building was built, the presses were moved the block down the town square to start a new life there.

Quanah Tribune (Texas, USA) early printing days in the 1950s-1960s.

Our pressmen and Linotype operators were all a little rough around the edges but that only served to make them more interesting. I worked at the newspaper collating papers and doing cleanup for many years. Not everyone in town knew my name but most everyone knew me as “Little Ed” – that editor’s kid. That made it rather difficult to get away with much. Eventually, the newspaper switched to offset presses but kept the Linotype and one or two of the letterpresses for job work. I used to deliver funeral notices to the stores on the square since this was a weekly paper and Wednesday might be too late to get the word out about a recent death in town.

Benjamin Eakin of E.W. Card Crafts (Texas, USA) posing for photos for the Quanah Tribune newspaper.

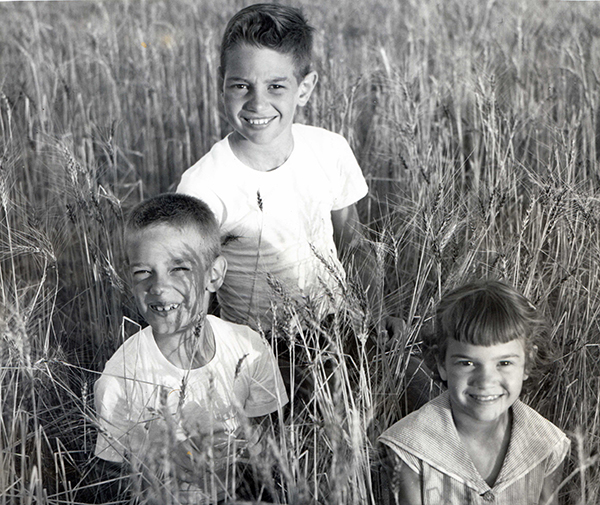
My brother, sister, and I did a lot of posing for photos to accompany news stories – for instance, posing in a wheat field for a story about that year’s crop. My father’s gone now and I’m afraid I don’t remember all the presses that were originally in the shop. There are some great memories, though, about the noise and smell of the press room.

Benjamin Eakin of E.W. Card Crafts (Texas, USA) as a book production manager before starting on his journey into letterpress printing.

I used to do the design and book layout for the book publishing company after years as the production manager. I was the one to first bring in a PC to test out typesetting on a personal computer instead of our dedicated Penta typesetting system. We gradually transitioned to PCs only. The designing I do now for the greeting card line, in addition to writing the text, has mostly to do with choosing a typeface for each card. My intent with the cards is to focus solely on the words to paint a visual picture for the recipient. We are so bombarded with images today that I cherish the chance to use my imagination to come up with its own visual. I’d like to think there’s a niche audience for the words I write and the look and feel of handcrafted cards.

PRINTING IN THE LONE STAR STATE My current shop is a small bedroom at home that operates as my home office and now home to my Craftsmen Superior press. I purchased the press last year from a couple who’d purchased it a couple of years earlier in New York. They ended up moving to Houston, Texas and life apparently got in the way – babies and such. I found it on Briar Press  and met the sellers just north of Houston to pick it up. The press rode in the passenger seat of my car for the trip back to Richardson – a part of the Dallas metroplex.

Benjamin Eakin of E.W. Card Crafts (Texas, USA) and his Craftsmen Superior tabletop letterpress on the ride home.

PART TIME PRINTER, FULL TIME FUN Sadly, I don’t print full time. In fact, the new online store was pushed back several months after I agreed to be a cousin’s executor. Sooner than expected, she died in late March of pancreatic cancer and several things were placed on hold as I tried to figure out how to handle that new job. My goal with the new online store, Quite Simply Cards, is to try to put myself in a position to give up my “day job” and concentrate on printing my greeting cards. I’m hopeful I can transition to printing full-time sometime in 2017. E.W. Card Crafts is named after my partner Tom Hayes and I. Edward is my middle name, William is Tom’s. Hence, E.W. – or Edward-William. We both worked for Eakin Press for many years in the past.The 1980s photo supplied of the two of us shows me on the left and Tom on the right. We’re a tad older now.

PRINTING FEATS I tend not to see my own accomplishments and rely on other people to point out that I’ve done something worthwhile. Yeah, I’m working on that rather poor self-image thing. Recently, however, I printed Shakespeare’s Sonnet 154 for the Oxford Bodleian Library’s call for entries to print all 154 of Shakespeare’s sonnets to commemorate the 400th anniversary of his death. While I pushed it to almost the deadline, I managed to get my entry there on time. I printed the sonnet under my private press name Little Boy Blue Press. I was a fun challenge taken on for the pure enjoyment of it.

Benjamin Eakin of E.W. Card Crafts (Texas, USA) and his Craftsmen Superior tabletop letterpress press.

BOXCAR’S ROLE Boxcar Press has been there from the beginning with help in determining how I was going to set up my press. That included walking me through why I really needed to work with InDesign to produce print-ready images for ordering the polymer plates. I also now have two of Boxcar’s Deep Relief bases to help in a faster setup and press change for printing. Answers to questions have always been readily available from Boxcar.

PRINTING TIPS Neat tricks? Well, I’m a little too new to have much in the way of tricks except for one thing. Since my greeting cards all have the same basic layout, I’ve set up Excel files with a representation of the grid on my Boxcar base. I export the type for a card to a PNG file with transparency. Once I position the polymer plate exactly where I need it, I place the type transparency in the Excel file for that card. Now I know exactly how to position the plate for subsequent runs of that card.

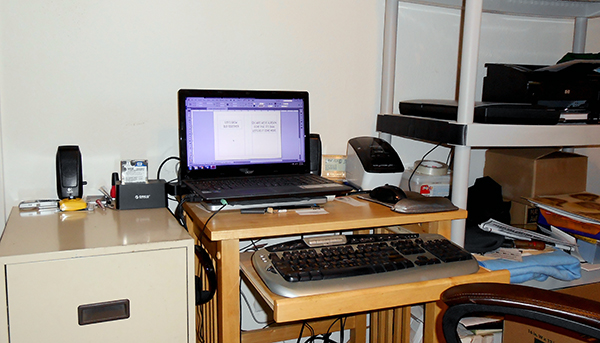
Benjamin Eakin of E.W. Card Crafts (Texas, USA) simple but efficient production and design set-up headquarters.

benjamin-eakin-texas-letterpress-printing-img8

Also, setting up one card aids in quickly positioning a new card since I can position based on the previous card – if the saying is wider than the previous card, I can center the type for the new card over the previous and so on. I save a file for each greeting card for quick reference.

WHAT’S NEXT Plans for 2017? Hopefully, I’ll be able to print full-time. No plans right now to expand beyond the greeting card line but would like to think we’ll be successful enough to perhaps purchase something like a C&P 10×15. That would be too large for my home shop, so would mean finding a small commercial office. That’s the goal in the long term. I don’t see myself officially retiring. I have no reason to believe I’d be happy without some new project in my life. And it seems I never tire of finding new projects.

We’re cheering on Benjamin as he starts his new greeting card line and a huge round of thanks to him for letting us get the scoop on his wonderful printing heritage. Catch him here on Facebook!

One Last Dance For Photopolymer Plates: Ink Stamp Pads

Here at Boxcar Press we’re always looking for new ways to give printing supplies “one last dance” before recycling or dismissing items into the wastebasket. One of our clever and resourceful platemaking customers, Meredith Pinson-Creasey of Purple Dog Press shares with us an experimental & last-time use for her custom-ordered photopolymer plates: using ink stamp pads to apply ink to the plates. Meredith weighs in on the pros and cons of using ink stamp pads for printing (and with some rather nice results).

Helpful note: please do remember that our custom-made photopolymer plates work best with letterpress printing inks (such as rubber-based or oil-based inks) which are rolled on to the surface of the plate.  Many other art inks are water-based and since our plates are water-wash out, using these products can degrade the quality of plates. Please use caution and good judgement if experimenting with water-based ink stamp products.

THE EXPERIMENTAL PROJECT I have been experimenting with some of my old polymer plates, trying to get my logo to print on the cotton twill fabric tape and boxes I use to wrap my letterpress cards for gifting. You guys may have already tried this and I may not be sharing new info, but I’ve had great luck.

My 82 year old mother continues to be the most fearless artist and crafter I know. And her father could repair or make just about anything. It is their “eat first, ask questions later” attitudes that inspire me. As a sports, landscape, and baby photographer, and an amateur letterpress printer with a 1940’s 10 x 15 Kluge, I wanted the packaging for my photo/letterpress cards to be personalized with both my logo and the recipient’s name, or a greeting. The most economical route was to purchase blank ribbon, boxes, and bags to customize as needed. I have printed my own packaging using silkscreen and linoleum blocks, but wanted something faster with less set up time. Having dozens of rubber stamps made was too expensive. So I decided to experiment with some of my retired polymer plates from Boxcar Press.

Using photopolymer plates experimentally with ink stamp pads for a final use.

INK PAD TIPS Working with dye or solvent ink pads produced the crispest image, due in large part to the firm surface of the pad. Pigment inks have a foam pad which can cause the ink to go down into the recessed portions of the polymer plate producing a blurred image. A brayer may also be used to transfer the ink from the pad to the polymer plate to provide even coverage and less mess.

Using polymer plates as a stamp works best when attached to a block of wood or a clear stamping block to ensure only the image or text comes in contact with the fabric. The wood block I used has a slick finish designed to release the temporary stamp easily. Three brands of ink pads worked well for me: Ranger Ink; Hero Arts; and StazOn. Ranger Ink’s “Dye Ink Pad” and “Archival Ink” in all colors I tried worked well. Hero Arts makes terrific “Neon Dye” Ink colors. StazOn’s “Solvent Ink Pad” worked equally well. These inks are waterproof, permanent, acid-free. and the pads are refillable. My guess is that most brands of dye or solvent ink would produce great results.

Using photopolymer plates experimentally with ink stamp pads for a final use.

MATERIALS TO TRY (AND ONES TO AVOID) A few of the materials I’ve stamped with polymer plates include: birch wood tags, twill ribbon tape, glassine food bags, kraft gift boxes, and paper. Although pleased with all the results, the glassine takes FOREVER to dry and the wood tends to bleed sometimes. The bleed may be the result of over inking or applying too much pressure to the stamp because some of the images did not bleed. Kraft paper enhanced the grunge look of one of the fonts. Ink wipes off easily easily with a cloth but will stain the recessed portion of the plate.

(Boxcar’s note: One important thing to note about polymer plates versus rubber stamps which can affect your results and determine which materials are best to stamp on. A polymer plate is a hard surface on a thin substrate. In contrast, a rubber stamp is soft, pliable and cushiony. These properties will work for or against you when you are stamping and experimenting will be key).

THE RESULTS Text of various sizes and weights, and line drawings as thin as .75pt printed well. Because the inks are translucent, this alternative use of polymer plates will not produce a silkscreen type effect.  My faux postage cancellation polymer plates worked great and the uneven application of ink makes it look even more authentic. Expect to see the fabric beneath graphics containing large areas of solid polymer. For best results, I recommend using plates no larger than about 4 x 6 inches, or about the size of your hand.

Using photopolymer plates experimentally with ink stamp pads for a final use.

I love it when my tools can do double duty and this is much more economical than having dozens of custom rubber stamps made. Now if I could get my Kluge to churn butter or something, maybe my husband wouldn’t grumble about the space it requires.

WHAT’S NEXT No longer limited to someone else’s rubber stamp designs, I am looking forward to putting some of my own quotes and graphics in polymer. When I gang up those plates for my Kluge, I’ll be squeezing in another stamp idea. While this alternative use of polymer plates may not appeal to a commercial print shop, I do recommend the idea to anyone looking to complete their branding with a personal handmade touch.

THE FINE PRINT So here’s the fine print: polymer plates degrade with water. Rubber stamp inks are water based. Polymer plates don’t really play well with rubber stamp ink and will degrade over time. I think I’ll go through quite a bit of ribbon before that happens, but I’ll keep my stamping plates separate from my printing plates.

A huge appreciative round of thanks goes out Meredith of Purple Dog Press for her excellent advice and tips!

Inktacular!

A common downfall of new printers using light colored inks is thinking the print will be the same color as how the ink looks in the can. Here is a can of nice deep rust orange ink but it is actually meant to be a light apricot color. When applying an unfamiliar ink to your press, use a small amount and work your way up to color. That is much easier than having to wipe ink off and possibly put lintballs from a rag on the ink drum or disc. If you do have way too much ink on, it’s less trouble to simply wash up and start over. There is never an end to learning more press tricks!

apricot letterpress ink canapricot ink letterpress printed at Boxcar Press