While managing a Baltimore, Maryland stationery store, Kari Miller of Tiny Dog Press fell in love with letterpress printing while attending a weekend class in Austin, Texas. Fast forward a few years later, and the happy-go-lucky printing gal set-up shop in her cozy (but comfortable) 20’ x 20’ garage. Packed to the brim with printing sights, smells (ah! the smell of fresh ink), and studio canine pals, Kari has carved out a slice of printing heaven at home. We caught up with the Baltimore-based printer as she talks shop about an amazing love for letterpress, urban gardening, and the kicking off a new card line.
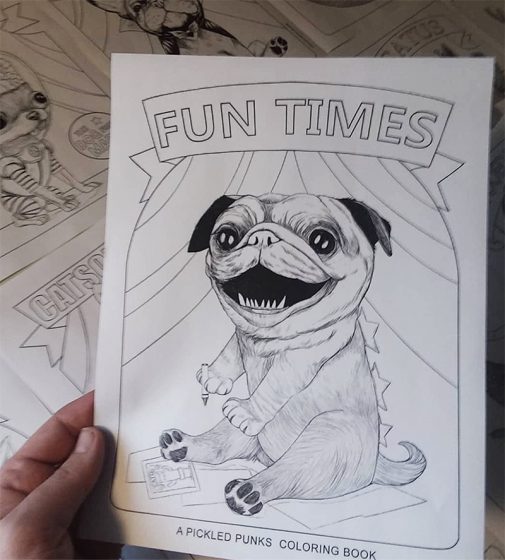
 (all photography courtesy of Side-A Photography)
PRINTING, PUPS, & PASSION I am a Baltimore-based, Texas native with a deep love of printing, color, and urban farming.
I am the owner of Tiny Dog Press in Baltimore, Maryland. I am married to my loving & supportive husband and we currently have 2 dogs and 2 cats who love driving me crazy by barking at every bird in our yard while I am printing. I have a Bachelor of Fine Arts in Studio Art with an emphasis in Printmaking from Baylor University in Waco, Texas.
I love city life and love living in Baltimore, Maryland which has a rich history in culture and printing.
When not in the studio, I spend time planting and tending my urban farm, otherwise known as the jungle of my backyard. During summer months, I can be found leaving boxes of vegetables on neighbor’s porches.
FOR THE LOVE OF LETTERPRESS While at Baylor University and searching for a degree that would intrigue me, I landed on Studio Art in Printmaking. At the time, my most recent art class was from elementary school. The dean allowed me to take Drawing 1 and 4-1/2 years later I graduated awarded as one of the top students.
Unfortunately, Baylor did not have a letterpress. That was the only print form I did not study in college. Years later I was managing a stationery store in Baltimore and was introduced to the commercial side of printmaking. I immediately fell in love with several letterpress companies (all of who I still follow). I understood letterpress printing by concept at that point, but did not learn the actual process until a few years later when I attended a weekend class in Austin, Texas.

The love of paper, smell of ink and physical labor required drew me to printmaking. I loved being able to reproduce one image and share it with multiple people. I love the feel of the impression with letterpress printing. At markets, I ask each customer if they would like to feel a card. I believe the handling of the paper and experiencing the impression gives a greater joy to the receiver of the card than one that is printed digitally.
TINY SPACE, BIG HEART Tiny Dog Press’ print shop is in my 20’x 20’ garage. We purchased our home knowing I would need a studio workspace. Few houses in Baltimore have garages and ours happens to be a detached garage which makes it into its own separate building. I love my little garage. Shortly after moving in, we renovated the space which included rebuilding 2 termite damaged walls, adding windows, a sink, new walls, cement floor, lighting and doors. At the end I was told by our contractors that it would have probably been better to do a full demo and rebuild. Little did they know that printers love restoring old and broken things in order to make new and beautiful work.

The best part about the location of my studio is that I stay within my neighborhood/community. During most months, my windows display my garden. School days I hear, see and wave to the kiddos walking past after school. During the summer months, I open the studio up for neighborhood kids to produce work with artistic mentorship. I love receiving knocks on the door from kids who know they can come in to draw, paint or print for 15-20mins before running back out to play. One young lady has been my apprentice for the past 3 years. She started with helping fold & package cards. This past summer, I taught her how to print, mix ink and general up keep of the shop. During August, she designed and printed her own cards and then sold them at a holiday market! All of which she loved doing while it helped her push herself to new levels within her creativity and abilities to sell her products. I love when I receive random knocks on the door with kids showing me their recent design ideas! If I was in a traditional location, I know this would not happen as organically.
PRINTING MENTORS Kyle VanHorn & Kim Bently have been great mentors as I have started my business. I started Tiny Dog Press while renting print time at The Baltimore Print Studios.

As for printers who inspire, I will always love the work of Kiki Smith for its artistic beauty. For commercial printers, I was first drawn to letterpress through Mr. Boddington’s Studio and Hello Lucky.
DESIGNED FOR PRINTING I am a printer at heart. From the touch of the paper to the smell of the ink, my happy place is being behind a press. I have a love-hate relationship with the computer. I design due to its necessity to grow a design-print business. I love printing for graphic designers, which is an area that I hope to grow in my business.

FULL TIME FUN I have been running Tiny Dog Press as my full-time job since March 2013. At the time, I was also running another small creative business. Now I only focus on letterpress printing through Tiny Dog Press. I have focused my business to grow organically, building the business with profits it produces. This year I will start paying myself from the business! My husband and I wanted the business to be self-sufficient from the start, so we have focused all profit back into growing the business.
PRINTING FEATS 2016 was a year of many accomplished goals within the business. Each accomplished goal brings great joy. The two that I was most proud: first time a product published in the Baltimore Magazine local shopping guide {August 2016 edition} and bringing on 5 new retail stores, one of which I had been wanting to have product at for over 3 years! 2017 has started off great with a first time mention in the Mid-Atlantic edition of The Knot Magazine!

Besides those goals being accomplished, as a business I am most proud of being able to use my business for more than producing products but also to reach my community for something bigger than the stationery I produce. This past November, I was proud to organize and host the Benefit Baltimore Market that brought more than 500 people out on a cold & rainy “Giving” Tuesday evening to a local brewery in support of 5 Baltimore City non-profits. Through beer, food and vendor sales, collectively we raised $2,000 which were donated to the 5 non-profits. In August, I collaborated with a local retail store to create and sell cards that would benefit a popular area that experienced severe flooding. I love having a small business that gives back to the community where it is placed. I love having the financial ability within my business to be able to give back to the community. I hope this is something Tiny Dog Press is able to continue and grow further into.
PRESS HISTORY Besides working on presses as a college student, my “first” press is the L Letterpress. Embarrassing, but we all have to start somewhere. After taking a class in letterpress printing and not having access to a press or permanent location to house a press, I purchased the L Letterpress to print mine and a friend’s wedding invitations. I still have the press and use it for kid workshops.
After moving back to Baltimore, I was able to focus on letterpress printing by renting time at The Baltimore Print Studios printing on a Vandercock SP20. I purchased my 1949 Chandler & Price press in 2014 and finally finished restoring it in 2016!

BOXCAR’S ROLE I purchased my first printing plates from Boxcar Press back in 2010 when I was printing on the L Letterpress. Since then they have been a great resource for plates and materials. When setting up my studio, I purchased my base, ink and several small supply items through the Boxcar store.
SHOP TIPS Any advice I have, others gave to me. If you are looking to start your own print shop, don’t fret – a press will come on your radar at the right time! Don’t try to force that time to happen sooner than it should. I was working on having a C&P press shipped to me from Texas which I found in an antique store, when suddenly the press I now own came on the market and was located less than a mile from my house. Huge cost and logistics saving.
When switching to a new press, give yourself time and grace. Each press prints differently. Different is not worse or wrong, it is just different. Learn how to design towards those differences or learn how to use those differences as a positive in product development.
Also, remember to ALWAYS check your crop mark line thickness or Boxcar will call you when you are at the grocery store.
WHAT’S NEXT Spend more time in the studio designing new cards and getting my hands dirty with ink! I am also looking at hosting a kids maker camp this summer and several kid focused workshops.
Huge round of thanks out to Kari at Tiny Dog Press. Catch her amazing new work on Instagram, Facebook, Twitter! Printed goodies can be purchased here on Etsy.


 (photography courtesy of
  (photography courtesy of


