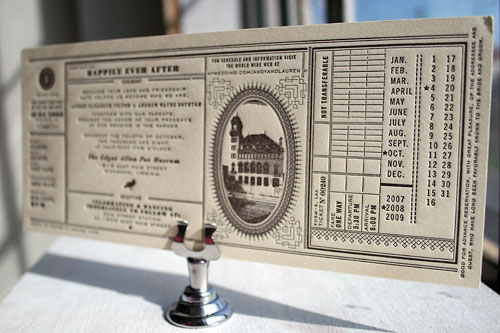
The L Letterpress Revisited

It’s been a few years since the popular L Letterpress Machine by Lifestyle Crafts hit the market, and since then other diecutting machine manufacturers have followed up with their own versions. Our original November 2009 blog post about printing on the L Letterpress has been read and positively received, so now it’s time for some updates that we hope will help you get the best results you can. If you are new to this machine – don’t read ahead until you have gone back to our original L Letterpress tutorial and gotten caught up to speed.

 (1) Using the right brayer.
We recommended that you toss the ink roller that came with the machine and suggested some new, soft options. Here are a few more sources for soft brayers – particularly the Speedball brand: McClain’sDaniel Smith, and Amazon.

(2) Using the roller bearers from your KF152 plate order.
So, of course, you are ordering your custom letterpress plates from Boxcar Press.  If you are a do-it-yourself person who loves letterpress than you will want to put your own personal stamp on what you are printing with your own designs and text.  Here is what we recommend when you place your order so all is clear on your end and ours:

  • In the comments section of your platemaking order, write in capital letters – SEND STRIPS.  We will be trimming your plates down but let us know that you want strips, lots of them.  Keep them and use them on future printing jobs.

Roller bearers are really important, and if you’ve ever tried to ink without them, you likely wanted to tear your hair out.

(3) Tips to control how much ink you apply to your plates.
The manufacturer sent you a small plastic square slab – approximately 6″ square.  We’ll call this Slab 1. This was for squeezing your ink onto and rolling your brayer through.

STOP! Our suggestion is that you get another plastic or glass slab of greater size. A piece of glass from a picture frame works well. We will call this Slab 2. Two slabs will improve your inking tremendously.

Squeeze your ink onto the smaller plastic Slab 1. Or scoop out your ink from your 1 lb can – about 1 tablespoon.

L Letterpress printing tips from Boxcar Press

Use your Boxcar Press ink knife and work your ink so it’s a smooth and easy consistency.  Imagine making scrambled eggs and use that motion – turn over, pull through the ink, over and over.

L Letterpress printing tips from Boxcar Press

Now, take the ink knife and pull the end through your mixed ink so you have just an 1/8″ inch round roll of ink on the end of the ink knife. Spread this on your larger second Slab 2 by dabbing it in a line at least equal to the length of your brayer.  Now roll your brayer through this.

Really work the brayer back and forth until it’s consistently and evenly covered. Now roll the brayer over your polymer plates and run a sheet of paper through the machine. Look at your results up close. There shouldn’t be any feathery bleeds outside your impression on your paper.  If there is, you have too much ink.

(4) Removing excess ink
Go back to Slab 2 where you used your brayer.  Use your ink knife and scrap away some of the ink and return it to the first Slab 1 where you mixed.  Now lightly wipe some of the ink off your brayer with a cloth rag (old t-shirts are great for this).

L Letterpress printing tips from Boxcar Press

Wipe off your polymer plate gently, also with a soft cloth. Run your brayer through your ink on the second Slab 2 again and try another impression. You should be seeing less ink.

Use Slab 2 for your brayer only.  As needed, add more ink as in tiny amounts from the ink on Slab 1.  This will help you control your inking and prevent over-inking.  You will be amazed how little ink is needed on your polymer plates for a good inking.

(5) So many ink choices
L Letterpress sends an oil based tube of black ink with the machine.  They also have more colors available in craft stores. These inks are fine, although you really can’t re-use any leftover ink so don’t over squeeze too much ink out of the tube.  Also, they are a little more challenging if you want to try mixing your inks for more colors.

Other suggestions include Van Son Rubber Based inks in 1 lb cans from Boxcar. They come in Pantone colors and you can feel more confident about mixing some colors together if you have a Pantone Uncoated Formula Guide. However, they are only in 1 lb cans and the cost can go quickly from $13 a can to $30 a can for each color. If you are planning for long term, this is a good choice as you can mix your colors and save them for printing another time.

One other suggested ink is available in tubes and colors – it’s an oil based ink called Caligo Safe Wash Ink. They are easily washed up with soap and water. One note of caution though – which takes us to the next step – CLEAN UP.

(6) After Printing, Clean UP.
Don’t ever use water for cleaning up your plates! Do not use water based inks and don’t use water to clean up the inks from the plates. You can use a soft cloth rag to wipe off the ink off your plates.  If you inked correctly, it’s just on the surface of your plates and should wipe off easily.

L Letterpress printing tips from Boxcar Press

L Letterpress has developed some wipes that you can buy – use them only to clean up the L Letterpress equipment and the slabs you used to mix and spread your ink.  Keep your plates from water and moisture or they will soften and deteriorate.

If you want a professional press wash – we suggest VARN California Wash. The smallest size available is 1 gallon; however, it’s a good investment if you expect many years with your L Letterpress.

(7) When you like thicker paper
Your L Letterpress comes with a 1 ply or 100 lb paper.  But if you’ve fallen in love with a thicker stock like museum board or something that is 220 lb or greater thickness, you’ll need a little bit more of prep to get great results.  You can use this paper in your machine and with our polymer plates, but there will need to be some planning when you prepare your files for platemaking.

First, let me explain some of the wonderful things about photopolymer plates. They are easy to cut with
scissors and translucent which makes it nice to see your press bed grid through them. So you can take a bunch of images and text and gang them all up onto one plate leaving just 1/2″ between them to safely cut them apart. Then, you can place your pieces on your L Letterpress press bed exactly where you want them and they will stick with their adhesive back. This all works fine with 100 lb paper, but if you try this with thicker paper, the edges of your plates may also impress into your paper — not what you’re looking for.  So here is where the planning takes place. You will have to design your polymer plate to be slightly larger than your final finished paper size, which means paying a little bit more in platemaking costs for that extra space, but it’s worth it when you see your impression on the double thick paper.

So, when you send in your design, include crop marks on your outer edges so we give you all the plate material border you will need.  If you use precut paper, plan your plate size to be just larger than your paper.  If you are using paper that you will print and cut later, your plate only needs to be larger than your “live area”, that is, the impression from the edge of the plate can push into the area that will be cut off later.

(8) Odds and ends for better printing.
Remember that your paper always has two sides, so while you are working on press setup (makeready) getting everything lined up and perfecting your inking, etc. just hold on to your paper goofs.  Either turn them over and use the back side or just use it for the next time you are setting up in a different color.  Here at Boxcar Press, we use some of our paper sheets multiple times while we get everything just the way we want it.

L Letterpress printing tips from Boxcar Press

  • Invest in Henry Gage Pins – these small, repositionable “tabs” are handy and will do a great job holding your paper in place.
  • Or try this other suggestion for holding your paper in position: take a sheet of the paper you are printing on and trim one sheet down into an “L” shape. Put removable double-sided tape on the back of it and set it aside for one minute. Place the paper you are printing on in position on your press bed.  Take your L shape and with the edges forming the inside of the “L”, move it up against your paper so it is tight against two corners of your paper. Adhere it to your press bed. Now you can always slide your paper against your “L” and have it in position before you close the cover of the machine. This works best with one color printing and smaller printed pieces.

L Letterpress printing tips from Boxcar Press

  • The plastic grid on your L Letterpress machine base has a white paper backing behind it.   If you are getting a little movement and sponginess in your grid base, a little hard packing could help. Your grid can lift out of the bed and you can either replace that white sheet with a thicker sheet or put more sheets on top of it.  Whenever you lift this clear gridded piece, make sure it locks back into place.  And as mentioned in our last post, you may have to tape this press bed at the corners to keep it immobile. Try experimenting by adding more or fewer sheets.

L Letterpress printing tips from Boxcar Press

  • Last but not least, don’t get discouraged.  There is a learning curve here.

And before you decide you want to print your wedding invites on the L Letterpress, start with a smaller project first for practicing.  Try holiday cards, thank you notes, or something that you don’t have all your emotions invested in while you are learning to use this machine.  It will make it much easier to keep up with the experimenting if you don’t have a deadline and a huge investment in paper for your first time printing.

Ready to get started with some L Letterpress projects? Be sure to check out our offerings and visit Papercrave next week to enter for even more project ideas and a chance to win your own set of L Letterpress plates!

Boxcar Talk with Haute Papier

When planning her wedding three years ago, Sarah Meyer Walsh couldn’t find anyone who could customize her wedding invitations, which ultimately served as her inspiration in launching Haute Papier. Her business partner Erin Miller joined her about a year later and they’ve teamed up in creating a stationery business that places equal value on high design and top notch printing. With two locations, Haute Papier is a luxury letterpress studio dedicated to couture letterpress, specializing in high end custom wedding invitations and stationery, including a selection of custom designs, fine stationery and gift items. Their stationery is available in more than 80 stores across the US and Canada. With their two locations and expanding retail collection, they managed to squeeze in some time for a little Boxcar Talk:

haute-papier

How did each of you first get into letterpress?

Of course, any stationery designer certainly loves the look of letterpress. Prior to doing our own printing we would farm out the work to local printers – printers who we are proud to still call friends (and who we call on when we have a question about our presses!) We really really loved when our clients chose letterpress for their invitations and thought the one thing missing was knowing how to print ourselves. So we took a one day class in the basement of a letterpress hobbyist in Alexandria, Virginia. He was a super nice guy, but here we are two young ladies in a dingy basement hand cranking a tabletop press and just thinking we were so cool to be setting type and mixing ink and having a blast. To this day I’m not too sure what our instructor thought of us or our enthusiasm for letterpress. I think we quite overwhelmed him! Well, at the end of our class he handed us a copy of a newspaper dedicated to the letterpress community and in the back was a classified section. We honed in on our press, called the owner and purchased the press within 20 minutes of leaving our workshop. Now mind you, the press we bought was in Pittsburgh. We would go up and officially adopt her a few weeks later. And that is another the story in of itself. A story for another time perhaps!

What was your very first press (and are you using it still)?

A Golding Pearl 7×11. You may call her Pearl (we call her the gobbler)! She is semi-retired but still does a mean job on our envelopes!

What medium do you usually print (lead/wood type, photopolymer, lino, etc.)?

Photopolymer plates from Boxcar (specifically KF152)

What’s your process from sketch to press?

We love to draw! Our hand drawings and sketches form the foundation of our new designs. We also LOVE vintage images and sometimes incorporate those into our designs as well. So, from our doodling, we turn the designs into reality in CS4 and CS5 (depending on which computer we’re working on). Then we order plates from Boxcar and the rest, as they say, is history.

What other print shops do you admire?

We’ve always admired Studio on Fire for their ability to print anything!

What do you love about working with Boxcar Press?

Cathy Smith, of course! (read: wonderful customer service.) Of course, the quality plates keep us coming back for more!

Any neat tricks you can share?

I don’t know if we have any neat tricks, but I will say a deep breath goes a long way at times.

Who or what inspires you the most?

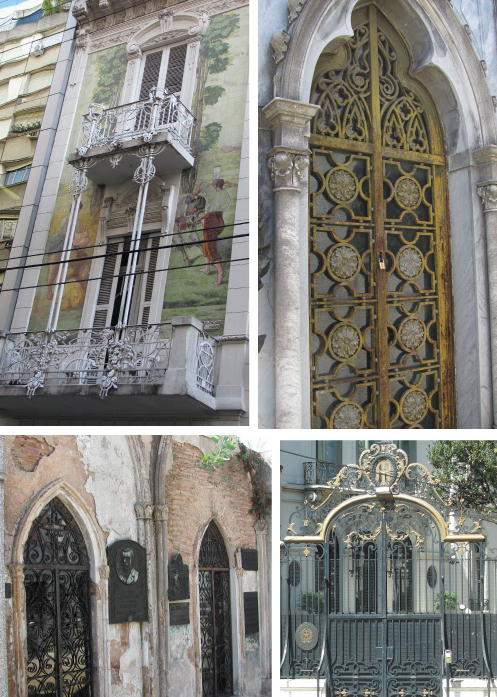
We find inspiration in so many different things. Right now, we’re in love with a bunch of photos that Sarah took of the amazing architecture in Argentina this past spring!

argentina-architecture

What’s next for Haute Papier?

We’re in the process of expanding our cash and carry lines and look forward to introducing it to our retailers!

What was the experience like for you at the National Stationery Show? Do you have any suggestions for people hoping to exhibit?

We love NSS! We’re going on exhibiting for our third year and love meeting new dealers and reconnecting with our current dealers. It’s also a nice time to meet fellow printers. As we all know, NSS is a costly undertaking so we really try and kill it! We are excited to be there and ready to talk everyone’s ear off who will listen to us about Haute Papier! It’s really about making the most of our week.

Thanks so much, ladies, for sharing a little insight about Haute Papier! For more about Sarah, Erin, and Haute Papier visit their website.

Boxcar Talk with Maginating

Brad Woods from Maginating has been on a wild ride the last six years. Although he had a degree in classical animation and a Master’s in computer animation, it was love at first sight for Brad and letterpress. Being surrounded by computers most of the time, letterpress enabled him to use his hands again: drawing, erasing, cutting and packaging until soon he couldn’t get away from the cast iron machine and the tactile qualities of letterpress. He took time away from his one man studio to have a Boxcar Talk:

maginating-press-national-stationery-show-2009

How did you first get into letterpress?

About six years ago I was at a restaurant with my sister.  She suggested I check out the shop next door – she thought I’d think it was pretty cool.  Turned out it was Sugar Paper, a letterpress company who specializes in stunning custom letterpress and includes a storefront.  Anyway, I was blown away!  I’d never seen anything like it before.  Jamie, one of the owners, was in the shop that day and was very kind – she was happy to answer all my questions.

About six months later I was fortunate enough to meet Bob Paduano – a master of all things letterpress.  He’s been in the business a long time and was able to restore a Kluge 10×15 for me.  At the time I was still doing freelance work so, for about a year, whenever I had some spare time, I worked down in our garage – trying to figure this big hunk of cast iron out.  I never took any classes…couldn’t find any that used platen presses.  I just kept looking online for answers, and spoke with all sorts of helpful and generous printers.  It took some time but eventually my knowledge base grew to a point where I was able to get going at an operable speed.

Believe it or not – my first job was a wedding invitation set. Miraculously, it turned out great – the client was very happy. Knowing what I know now, this was a craaazy first piece. I don’t know what I was thinking. In my defense, I plead temporary insanity (and a whopping case of ignorance.)  Glad I didn’t blow it!

Not long after that I stopped taking on any freelance work and dedicated all my time to creating a greeting card line. That was almost four years ago. (It’s important to note that none of this would have been possible had it not been for my lovely wife, Stacy.  She supported me all the way – encouraging me as I gradually expanded the card line and brought in no income…)

What was your very first press (and are you using it still)?

Yes, I still use my first press – a hand-fed 10×15 Kluge. It’s fantastic – I’ll probably keep it forever!!

What medium do you usually print (lead/wood type, photopolymer, lino, etc.)?

I only use photopolymer (specifically KF152)

What’s your process from sketch to press?

I have this little sketchbook (4×6) that I keep close at hand. It’s crammed with doodles – all the ideas that come to me, wherever I am… Most of the time they’re these crummy little drawings, but that’s all they need to be. I don’t want to pause to consider the logistics of a design but act more as a camera to my mental images. If an idea looks like it’s going to work as a card, I take a photo with my point-and-shoot digital camera and import it into the computer. I find it’s good enough quality to meet my needs and much faster than scanning. This next stage is where the computer comes into play – it’s hard to avoid. I prefer the crisp edge of a vector graphic as opposed to a raster one, so I tend to work in Adobe Illustrator (check this out for more information about the difference between the two.) I import the photo of the doodle into Illustrator and “trace” it.  A lot of the refinement happens in this stage and I try to keep it as loose as possible when using a mouse. Once I feel it’s done I then consider whether or not it’s good enough to be a card (I really don’t know until then). Sometimes it isn’t, and I’ll go back to the drawing board. Sometimes I’ll rework the design over a couple of months (or several years.)  For example, my “Birthday Owls” card began as an idea in 2006 but wasn’t released until 2009. Once it’s received the “Maginating Seal of Approval,” I send it off to you guys at Boxcar Press to be converted into a photopolymer plate and we’re off and printing not long after that.

sketch-design-process-letterpress

What other print shops do you admire?

I am a big fan of many, many print shops, however, I recently discovered Pie Bird Press at the National Stationery Show…their work blew me away – everything about it was awesome! (and yes, it’s letterpress!)

P.S. great blog, too

Who or what inspires you the most?

I find inspiration in a great variety of things, artistically speaking, some of those are:
Jon Klassen

Danish Modern furniture

William Joyce

Mo Willems

UPA animation studios

Alexander Girrard

Charles and Ray Eames

… and Jim Henson

What do you enjoy most about working with Boxcar Press?

I love Boxcar’s photopolymer system – I have a Deep Relief Boxcar Base and appear to be addicted to KF152 photopolymer plates…(but I can quit at any time – I swear).

Any neat tricks you can share?

As anyone who uses Crane’s Lettra knows, it draws like crazy when cut in large quantities. The same problem applies when you try to corner round a good quantity of finished cards. Our solution has been to create a die for each card size with round corners and the score line included. It’s quick, efficient, and everything comes out perfect!

What are you looking forward to? (i.e., upcoming shows, publications, events, etc.)

I’m working on a top-secret project right now…can’t tell you about it (but I’m very excited!)

What was the experience like for you at NSS?

We’ve been exhibiting at NSS for the past three years. This year was fantastic – it’s taken some time, but we’re finally beginning to see the full merits of what the show has to offer. While sales are always great (and we’re grateful for each and every one) the NSS offers a potentially massive networking opportunity. While it’s always been a part of our show experience, it’s becoming more substantial.  The opportunity to speak with bloggers, press, fellow card-creators, reps, designers and all sorts of other creative types is not only fun, but a great way to increase your “prosperity” at the show.

Do you have any suggestions for people hoping to exhibit next year or how to promote their new product lines?

There are so many details to consider when exhibiting for the first time at NSS. I would highly recommend signing up for the mentor program offered by George Little Management. This program will partner you with a “veteran” exhibitor – someone who has similar design sensibilities and product and has exhibited at the NSS before. And for those of us who have already exhibited at the show, I would highly recommend that they also sign up as a mentor for GLM’s program.

I would also recommend not using foam core walls – they may be fast and look great, but they’re expensive.  Also, once the show’s over, you’re probably going to leave the walls there (everyone else does) – which, to me seems like a terrible waste (and a bit odd, given the push on keeping this industry as green as possible).  I would recommend trying to create a flame-proof soft-wall, using some type of fabric, sign material – something like that.  I’ve seen all sorts of amazing applications!  The show’s already expensive enough and the last thing you want to do is spend more money on shipping or materials (or foam core walls).  That said, I have semi-hard walls (burlap stretched over wooden frames).  Had I known about the weight and shipping factor (my booth’s just under 400lbs.), I would have done a soft wall.  I’ll keep using what I have for now (get my money’s worth), but will go the soft-wall route next time around, for sure.

Thanks, Brad, for such fantastic advice and input! We can’t wait to hear about your top-secret project!

L Letterpress Printing Results

A while back, we reviewed the L Letterpress and provided some printing tricks and tips for achieving good quality prints with the L Letterpress and our KF152 photopolymer plates. Amy Graham recently put our tips to the test, ordered a set of plates and with a little and trial and error, printed her own letterpress wedding invitations. They look great! Amy shares, “The results are impressive, using your suggestions.  I achieved the best results using minimal ink and cleaning the plates, roller and inking block about every six prints.”

And check out her invitations –
letterpress-l-boxcar-photopolymer-plates-letterpress-wedding-invitations
Great work, Amy, and thanks for sharing! You can check out Amy’s design work at avail & company.

Boxcar Base and Plates in Action: Officina Briani in Raleigh, North Carolina

Receiving awesome letterpress samples from our platemaking customers never stops being fun for us. These come from Officiana Briani in Raleigh, North Carolina where Brian Allen brings over 30 years of work in the field of typography to his love for letterpress. Brian tells us that his primary press is a Swiss-made Gietz, approximately 12×18 inches, unknown model, unknown date of manufacture, likely from the late 1950s or early 1960s – a sweet press, with adjustable roller height, considered one of the best hand-fed platen press ever made. He uses a Boxcar Base and KF152 photopolymer plates, except for those occasions where he turns to handset and wood type.

In addition to past work as a typesetter, calligrapher, digital typeface production worker and letterpress printer, Brian loves to teach the letterpress craft. “Teaching letterpress is a very important part of my mission, sharing my love of letterforms, etc. Most students are young women, but all are people seeking balance and to regain a sense of touch in their lives. Fewer than half of the students have thoughts of printing themselves, the rest just want to see what it’s all about and get their hands inky! I share my 30 years of knowledge of type and letterforms, let students look through my large library and soak in the camaraderie with other students who have felt alone in their passion for handcraft but have found a home at my studio. I love to emphasize finding the extraordinary (lovely letterforms) in the ordinary (a lowly trade). Words and their expression still matter in my world.”

Brian also has a really cool Albion handpress that he eventually plans to use to print posters, but currently uses for demonstrations when visitors come by the studio so they can print their own copy of a keepsake to remember their visit to Officiana Briani. Brian says, “It entrances and seduces people into the magic of communicating with letterpress! The press is an Improved Albion 18×24 from the 1850s, made in London. It’s a crude/elemental machine, but symbolizes much – the arguments over who we were to be as a country were printed on a wooden handpress, one lever pull at a time, just as our single vote makes a difference in the aggregate. The most refined thoughts of the Enlightenment were given physical form with a handpress, and I use mine to emphasize to young people that an individual’s thoughts and actions matter, can be given form. Truly the power of the press!”

Brian’s career has been a true evolution that has led him through three decades of work with typography and even led to his personal handwriting being developed into the Microsoft font Segoe Script, for which he is listed as co-inventor on the patent. He tells us that he found his path “accidentally, but inevitably by working first as a typesetter in Boston and New York in 1975-79, taking calligraphy classes and reading the history of printing and typography. In 1982 Sumner Stone hired me at Autologic, Inc. in Southern California, to work in the pre-desktop world of digital type. Autologic made 700 dpi typesetting machines for the newspaper industry. We used the German IKARUS software to digitize outlines of alphabets, which were converted to run-length encoded bitmaps.”

After a time, Brian found himself at Imagen Corp. making type in a proprietary digital format for before moving to IBM to make fonts in the Folio F3 format, then PostScript Type 1 followed by TrueType formats. During this time, he opened his first letterpress shop as a part time venture, before leaving IBM to make letterpress his full time career. Eventually he closed his shop and returned to font production before finally returning to letterpress in 2005 when he moved to Raleigh and set up shop with Officiana Briani.

According to Brian, “The 1980s/early ‘90s was a very exciting time to be involved with fonts as the desktop revolution happened…It is quite amazing to see how many “civilians” know what a font is now. I was a part of the “font wars” in the late 1980s – the format competition between Apple, Adobe, and Microsoft, with Type 1 and True Type. Now of course, we have the blend of Open Type. The font wars are over. What comes next?”