When you are creating crop marks in Adobe Illustrator using the Effect>Crop Marks feature, the next natural question is: “How can I shorten them to save on custom-made platemaking costs and paper?”
We’ve put together a helpful quick tutorial of steps to demystify this task.
Making Crop Marks Editable So You Can Shorten Them
First, Open your file in Adobe Illustrator that contains crop marks (ones that were created using the Effect > Crop Mark feature. If you need a refresher on how to do this, our wonderful tutorial is here!).
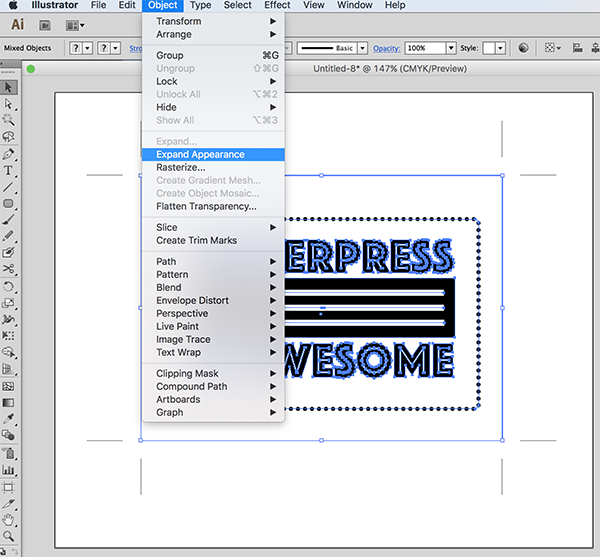
Select everything on your artboard. You can do this by manually selecting everything with your black arrow (default tool) or via Object > Select All. You’ll notice that the marks themselves are not selected. This is normal and fine.

Next, click Object > Expand Appearances (or Object > Expand). This will now make the marks editable.
Then, use the black arrow (default tool) to shorten your crop marks down from the default of 0.5″ to 0.25”. You can also thicken up your marks with extra strokes to bring them up to your plate type’s minimum line thickness minimum at this point, too.

Feel free to contact our prepress team if you have any questions as we’d be happy to help out. Stay tuned for more wonderful file prep tips and tutorials!
the given information is very helpful for the people and the shorten crop is properly described with the screenshots. keep posting this kind of things.
Thank you!