One of the more common questions we receive here in the Platemaking Department at Boxcar Press is: how do you check to see if your file is set up properly for color separations? Or in 100% CMYK Black (100%K where CMY are at 0%)?
One of the easiest ways is utilizing the Separations Preview palette that Adobe InDesign and Illustrator programs offer. To view the palette, simply select the following:
-In Illustrator (CS4 or above) WINDOW>SEPARATIONS PREVIEW
-In Indesign (all versions of CS) WINDOW>OUTPUT>SEPARATIONS PREVIEW
If you are using a version of CS3 or earlier, you will need to save your files, then place them into InDesign to check your color separations. In Adobe Illustrator CS3 or earlier, the separations preview window feature is not available.

Let’s examine how a file separates out using Adobe Illustrator.
If you are in CMYK mode, then you should see in the Separations Preview palette CMYK, Cyan, Magenta, Yellow, and Black. If you do not see all these colors, you are most likely in RGB or a different color mode and need to switch to CMYK mode. You can easily do this by clicking on FILE>DOCUMENT COLOR MODE>CMYK. Once you are in CMYK mode, click the box next to “Overprint Preview”, which will allow you to see what objects in your file do or do not have a certain color applied to it.
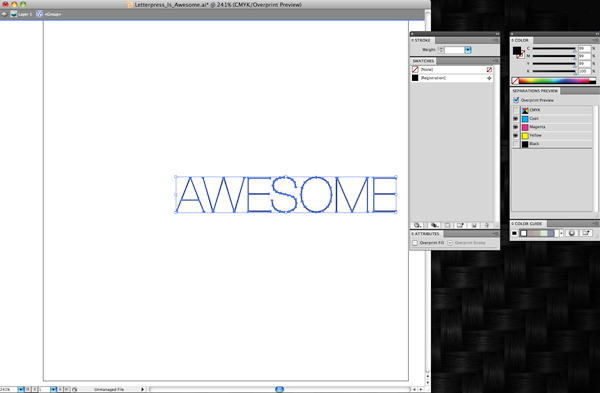
Let’s start with this nifty type sample in Helvetica Neue Ultra Light of “Letterpress Is Awesome”. We can see that it looks like all of the text is in black. Let’s take a look using the Separations Preview to see what colors we truly have here.

If we click the eye graphic next to “black”, all objects containing ONLY black will disappear, as we’ve turned off that particular color channel. What we have left is the word AWESOME but it’s now a funny shade of black. This indicates it is not in 100% black, but rather is made up of parts of cyan, yellow and magenta in addition to black. We don’t want this as it will cause errors in your film output. Easy fix, though. But first we need to access another window in our toolbox. If it isn’t already open, you will need your Color Window.
(WINDOW>COLOR)
Select the remaining text by clicking on it. In your Color window you will clearly see it is made up of parts of CMYK.
Move your cursor to the bottom far right of the color window to where there is a white rectangle over a black rectangle. When you are over the black color, the cursor should change to an ink dropper. Select the black and it will change your text to 100% black. See, the sliders moved to 0 for CMY. This text should disappear. Don’t worry! It’s good. Go back to your Separations Preview and click on the eye next to black. Everything reappears. Click off the eye and all items in 100% black only will disappear. That should be your test before submitting your files. If anything is remaining, it needs to be corrected.
If you are printing in another color and need a second plate for that color, your file should be set up to have those objects assigned to a spot or Pantone swatch color for multiple color printing. Stay tuned for our next blog post where we demystify multiple color files!