Whether you are processing photopolymer plates by hand in a DIY set-up or creating photopolymer plates with an industrial platemaking unit, the Stouffer 21-step Gauge is a commonly referred-to item and an invaluable tool to have in your platemaking arsenal. The gauge will help you figure out the exposure times needed for your processing set-up and allow you to make calibrated, quality plates time and time again.
What is a Stouffer Gauge?
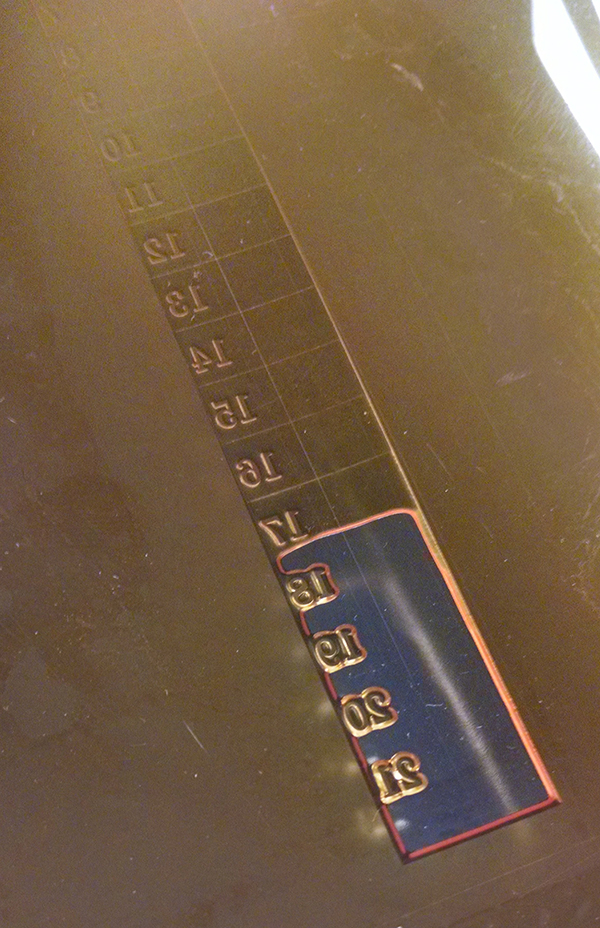
The Gauge itself is a small strip of reusable film negative that has numbers ranging from 1 to 21 corresponding to small blocks (or wedges) of tones ranging from light grey to a deep dark grey/black. The numbers are clear on the film allowing full light to pass through the film.

Like a normal piece of film, the Gauge had a dull side (emulsion) and shiny side (non-emulsion). For the gauge that we sell, the dull side (emulsion) shows the numbers in a wrong-reading orientation. The shiny side (non-emulsion) shows the number in a right-reading orientation.

When making plates, the dull side (emulsion) should face down and touch the plate.
How to Use The Stouffer Gauge
You’ll treat the gauge as a normal positive or negative film and process a small test plate. We recommend that you have a pad of paper & pen handy to record your test results and settings so that you can keep track of what times worked and which ones didn’t. If changing variables, change them one at at time and record your findings. This will keep your test (and results) organized and you can go back to previous tests if you have to backtrack.

Before starting, make sure that your bulbs are at 100% and the correct type (UVA bulbs in the 360nm-400nm range – if using black light bulbs – confirm the range). If using the sun as a light source, you’ll need to choose a sunny day, preferably with no cloud coverage. Recommended timeframes are between 11 am – 3pm when the sun’s rays are at their strongest and highest in the sky.
Your goal is to achieve the manufacturer’s recommended Stouffer Scale range for that particular plate.
Place the Stouffer Gauge (emulsion side down) on a small square or rectangle scrap of unexposed photopolymer.

If available, use the manufacturer’s recommended processing times as your starting point. If you need help with determining a good start time, contact us as we’d be more than happy to help out!
Expose per instructions for Main Exposure. You should see a faint outline of the stouffer scale when you hold the plate up and at an angle. Follow with Wash-out for the instructed time. If you are uncertain of the time for washout – check the plate at intervals to see if the edges of the exposure are clean and the plate doesn’t feel slippery or slimy. After rinsing the plate and sponging off extra moisture, you can check your Stouffer reading.
How to Read the Stouffer Gauge
To determine your exposure reading, read the lowest number of solid relief visible next to the clear exposed section of the Stouffer Gauge.
For example, the plate sample seen below has a recommended 16 on the gauge. The photo illustrates a good representation of the 16 wedge. The number (and corresponding wedge) is completely visible (e.g. not fattened, blotchy and not thinned out).

Use the Correction Table (as marked on the back of the envelope that the Stouffer Gauge comes in) to increase or decrease your exposure if you need to.

Example: Using 40 watt UVA bulbs and aiming for a 16 on the Stouffer Gauge:
First trial’s main exposure time: 100 seconds resulted in a solid 15 (with the additional observed results of a blobby 16). A 15 is considered “underexposed” and too low.
Since we’re aiming for a solid 16, we’ll need to go up a step. Using the Exposure Correction Table, to go up a step (increase step guide by…) we need to take our original exposure (100 seconds) and multiply this by 1.4. The next recommended exposure time is then 140 seconds.
Example: Using a single Nu-Arc UVA bulb and aiming for a 16 on the Stouffer Gauge:
First trial’s main exposure time: 600 seconds resulted in a solid 17 (with blobby edges around the top of the 17). A 17 is considered “overexposed” and the exposure time is too high/much.
As we’re aiming for a solid 16, we’ll need to go down a step. Using the Exposure Correction Table, to down a step (decrease step guide by…) we need to take our original exposure (600 seconds) and multiply this by 0.7. The next recommended exposure time is then 420 seconds.
Troubleshooting
Why are my numbers wrong reading when I’m looking at the fully processed plate?
The film strip was incorrectly applied (it was flipped) when placed on the unexposed plate. For the 21-Step Stouffer Gauge, the emulsion side should be face down and be touch the emulsion side of the unexposed photopolymer. If looking down at your set-up, you should be able to see the number and text in a right-reading format.
My target number is blobby or washed out What’s happening?
If your wash-out and dry times are correct, then you are underexposing your film. But you are almost there to your ideal exposure time. This means that the photopolymer hasn’t been hardened up enough to be able to hold on the plate when your plate is being washed and dried. Try boosting up your exposure time by 1/2 a step. This is where keeping track of your test times will be important. You are narrowing in on the time.

All of my number and tones are completely hardened up and I can’t see anything at all. What gives?
If your wash-out and dry times are correct, then you are overexposing your film by a bit. This means that all of the photopolymer has hardened up beyond what you need and is running into the risk of being over-exposed and flaking off. Try shortening your exposure time.
I’m recording a really, really long exposure time ( about 10 minutes + ). What’s going on?
A likely suspect is that something that is affecting your light source. Common issues are:
- Bulbs are low wattage (e.g. 15watt): A low bulb emitting a low wattage of light will take much longer to harden the plate as compared to a higher wattage bulb (e.g. 40watt). Some platemaking units were not designed to hold higher wattage bulbs. Also consult your platemakers recommended bulb specifications to avoid malfunctions.
- Bulbs are not outputting at full capacity: Bulbs should be changed if they fall below 70% output. Longer and increased exposure times from your optimal time are a sign of diminishing output. We suggest changing them out for new bulbs as this will give you the most accurate results (Boxcar Press can provide you with new light bulbs). You will need to run a new stouffer test every time you replace your light bulbs.
- Bulbs are too far from your plates or there are not enough of them or close enough together. Bulbs work best at 1.5” – 3” max away from your plate. Multiple bulbs next to each other give the best results for good plates as the light comes from both the sides and top to create strong relief on the plate. Your exposure unit may need some re-configuration.
- Using the sun: the sun’s rays will not be uniform in strength or duration as ozone, potential cloud coverages, and other spatial interferences will make the light emission vary in intensity. As powerful an energy source the sun is… it fluctuates and will take a lot longer to expose a plate properly as compared to an industrial exposure unit with calibrated bulbs. But it’s free and plentiful and a long exposure time may be what it takes. This is where your Stouffer scale reading will guide you.
I’m using a Nu-Arc. Any tips?
The Nu-Arc unit measures in light units and typically only has one bulb that is farther away from the plate. Times for exposure will be longer because of this light source. You will have to rely heavily on your Stouffer Gauge for pinpointing your time. If you have a large model, you may not be able to make a plate as large as the glass frame. The exposure times at the edges of the machine may be different than your center. A stouffer test at the center and corners will help determine that.
For more helpful tips on the DIY platemaking process and set-up, letterpresscommons.com has a plethora of information to check out here.